Follow Me On Social Media!
Trash Can Nachos: Indulgent Flavor Piled High for Sharing
Introduction to Trash Can Nachos
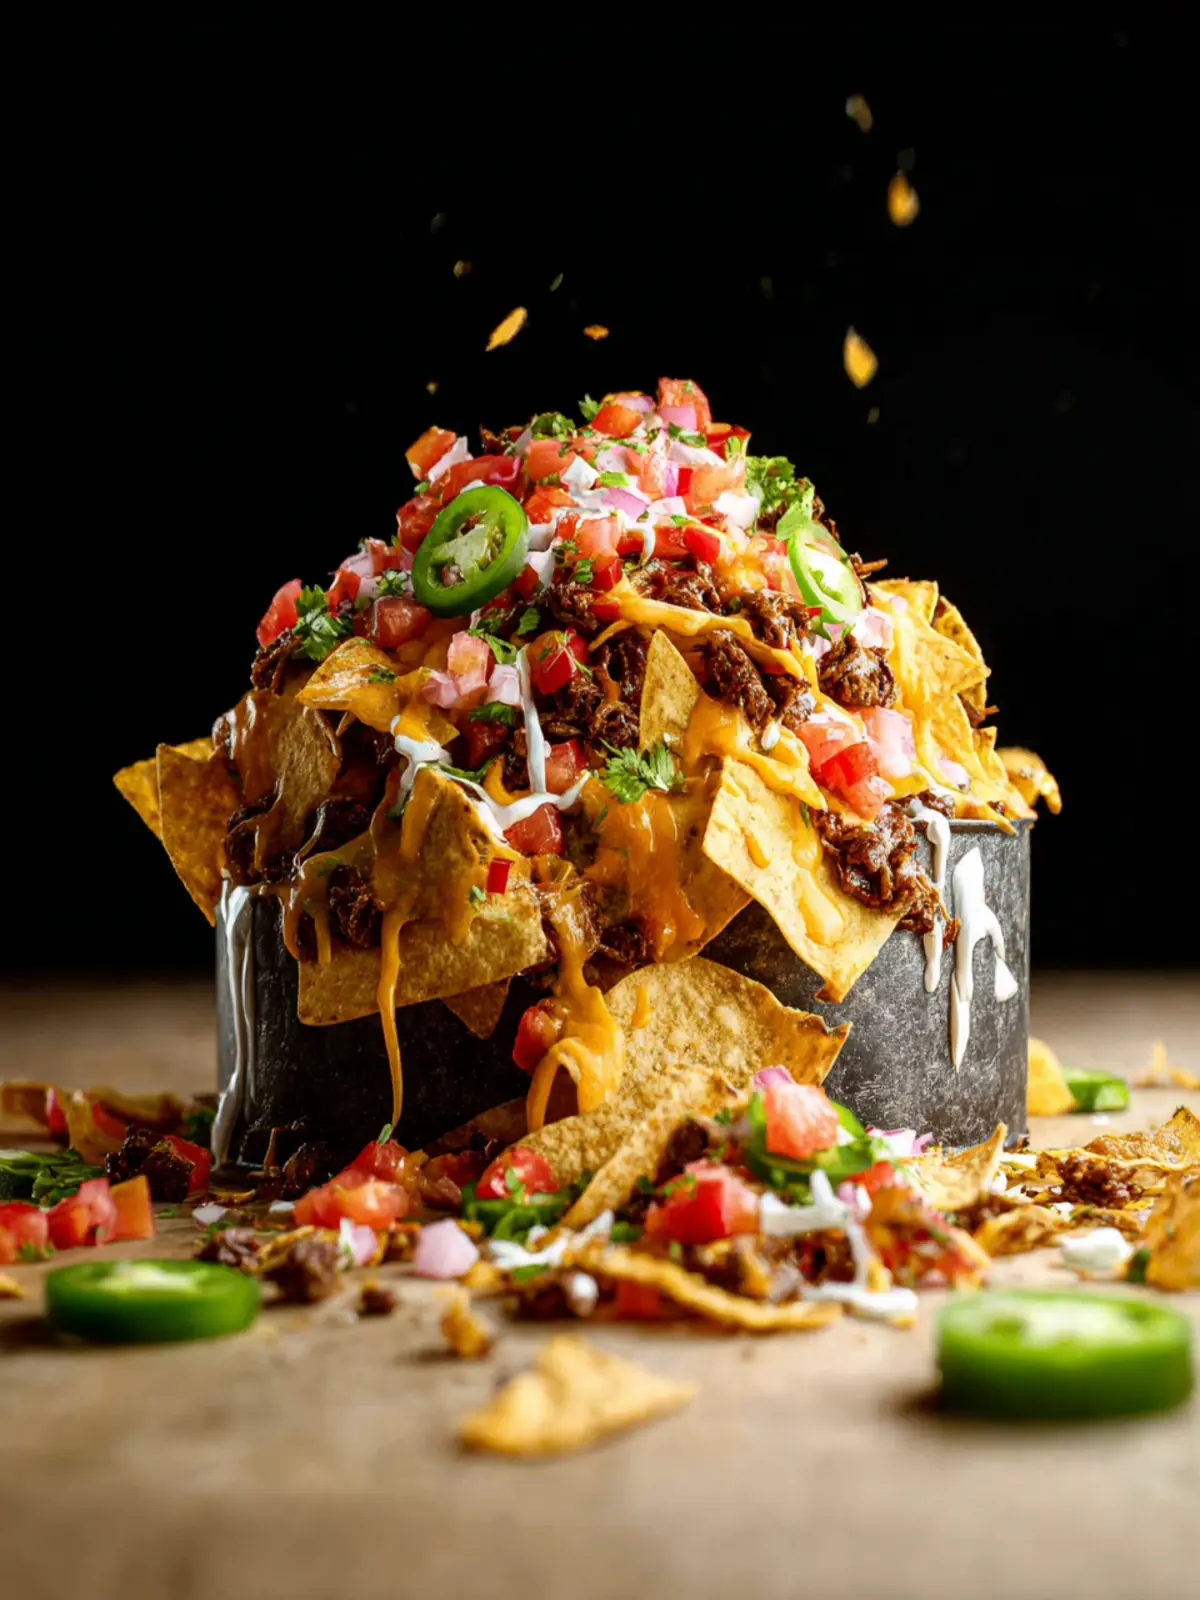
Trash can nachos take snack time to a whole new level, transforming a simple dish into an adventurous culinary experience. Imagine a towering pile of chips overloaded with ingredients, all piled high in a fun and daring way that’s sure to have your friends talking long after the last bite. It’s a dish that speaks to our love for creativity and indulgence, offering a free-for-all at any gathering or casual get-together.
Originating from the food truck scene, trash can nachos embody the essence of festival food, where each layer of ingredients creates bursts of flavor. What makes them especially appealing is the aesthetic—a chaotic mountain of toppings that feels more like a party than a meal. Whether you’re at a tailgate, hosting a movie night, or just hanging out at home, these nachos invite everyone to dig in and share, reinforcing the bond of togetherness over something delicious.
What Makes Trash Can Nachos a Crowd-Pleaser?
So, why are trash can nachos such a hit? Here are a few reasons:
- Adaptable Ingredients: You can customize them based on everyone’s preferences, whether it’s adding chili, jalapeños, or even a vegan twist with plant-based cheese. Every batch can be different, ensuring that everyone finds something they love.
- Interactive Dining Experience: Gathering around a giant serving can feel like a communal activity, inviting conversation and laughter. Everyone can build their nachos to their liking, making it a participatory dish that breaks the ice.
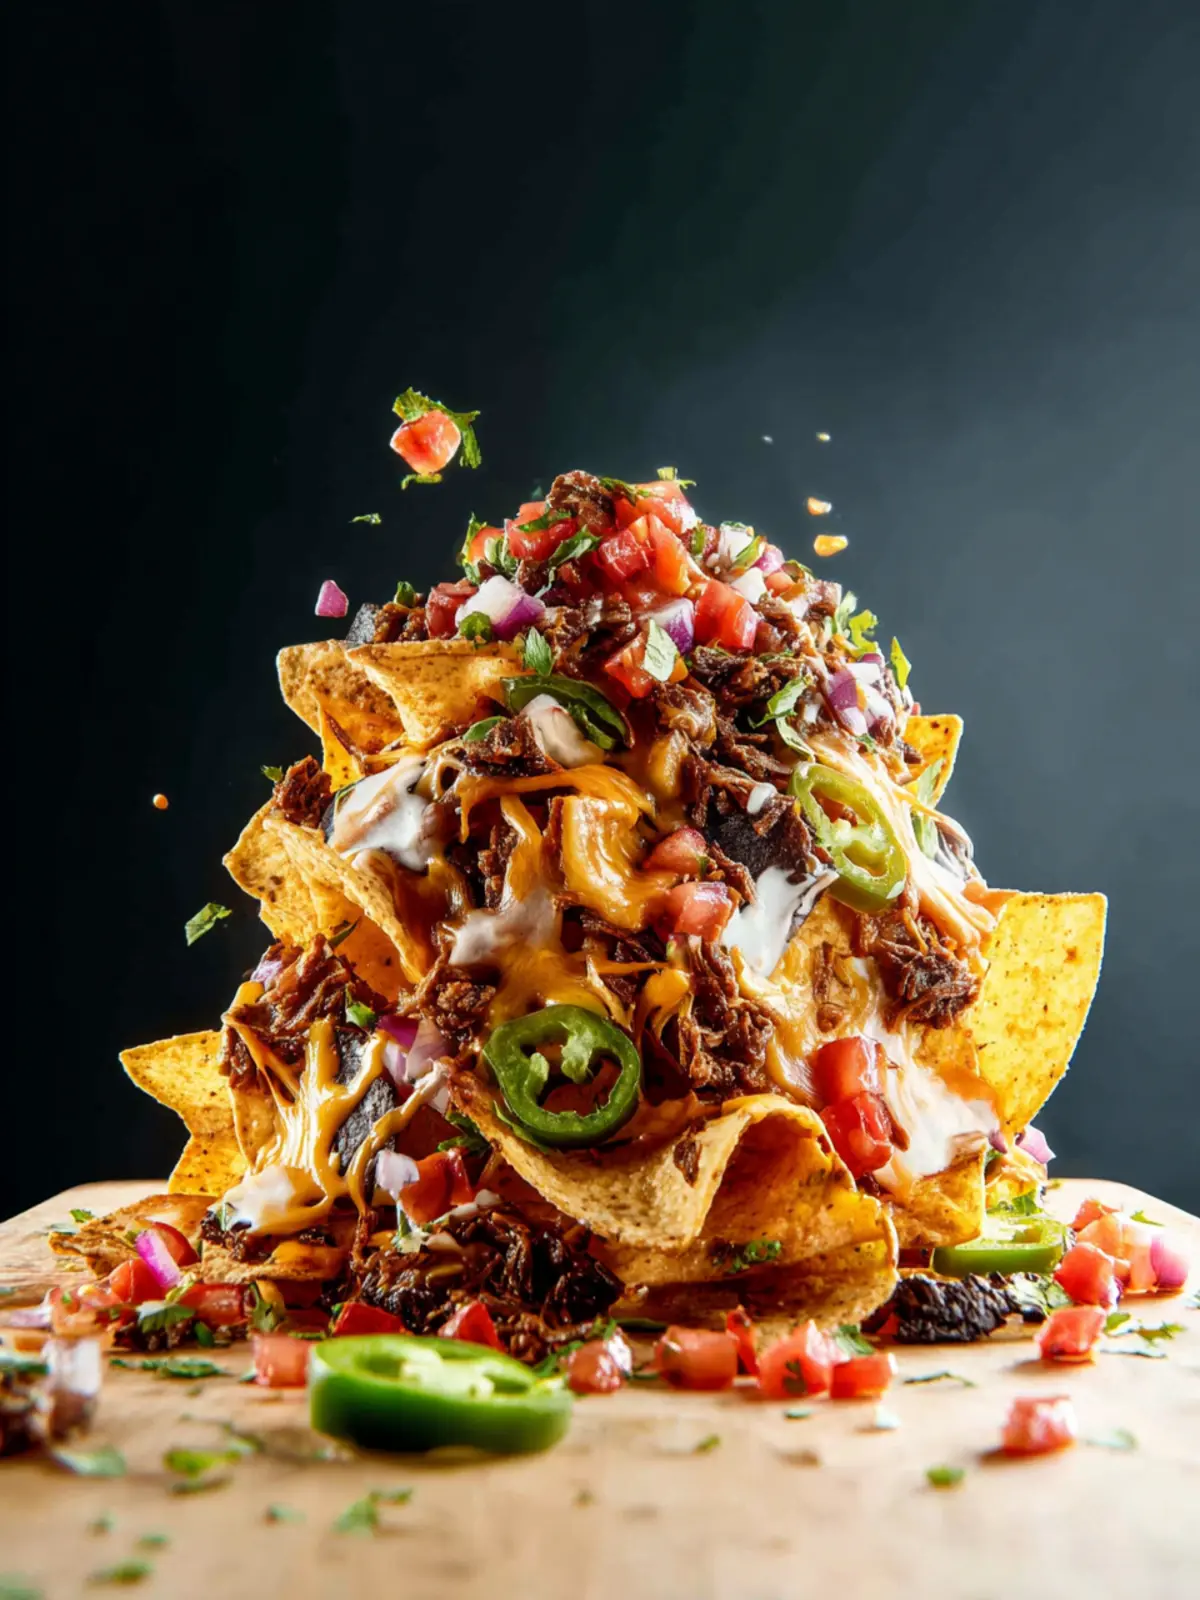
- Visual Appeal: The towering, messy presentation is not just mouthwatering; it’s Instagram-worthy too! Being able to showcase your creation can spark creativity and fun as you experiment with ingredient combinations.
Incorporating trash can nachos into your next gathering can elevate the atmosphere, turning snacking into an unforgettable experience. Are you ready to dig in and unleash your inner chef? Let’s gather our ingredients and whip up a batch!
Key Ingredients for Trash Can Nachos
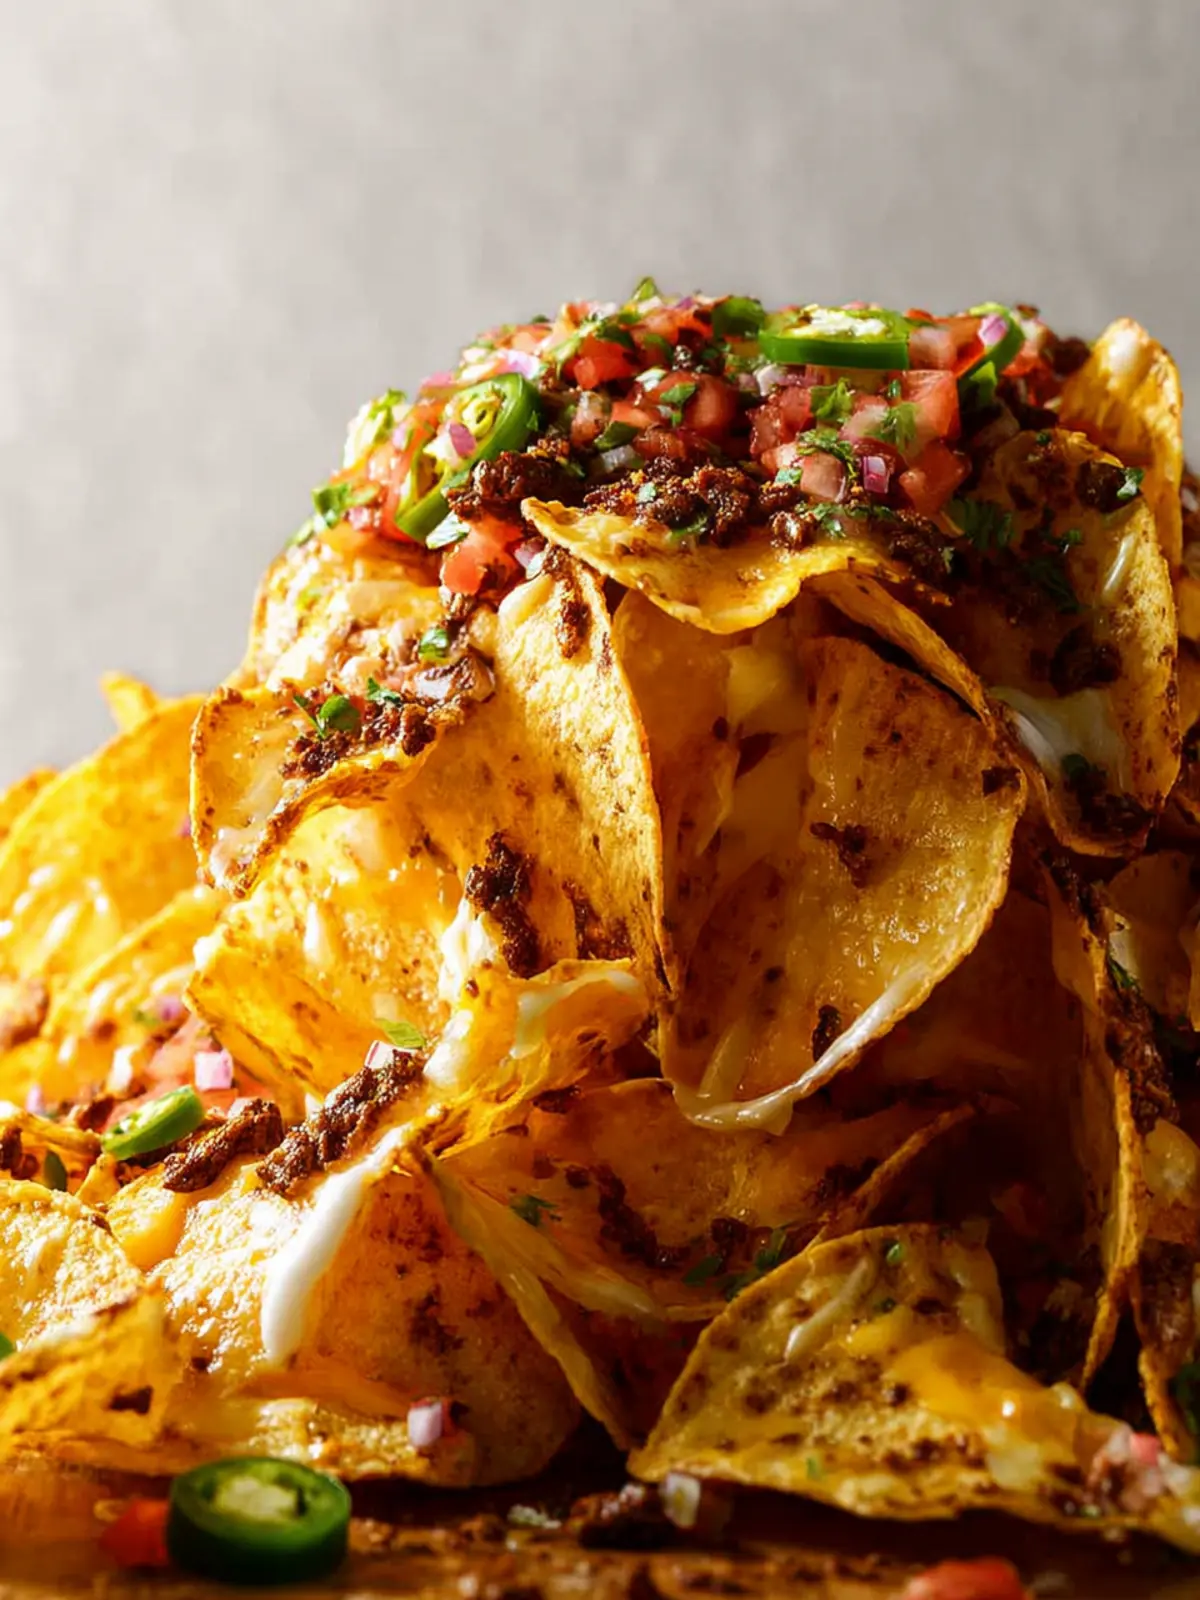
The delightfully chaotic world of trash can nachos begins with a base of crispy tortilla chips. These chips are your sturdy foundation, providing the perfect crunch that holds everything together. Opt for restaurant-style chips that are thicker and can bear the weight of all those toppings.
-
Cheese: A blend of sharp cheddar and creamy Monterey Jack is my go-to. The sharpness balances wonderfully with the other flavors and creates a melty, gooey texture that’s simply irresistible.
-
Protein: For a hearty touch, consider using seasoned ground beef or pulled chicken. These add a savory depth, making your nachos not just a snack, but a full meal experience.
-
Toppings: Fresh ingredients bring vibrant flavors to your trash can nachos. Use diced tomatoes, jalapeños, and black olives for a pop of color and taste. Don’t forget to add some chopped green onions for a bit of freshness.
-
Sour Cream and Guacamole: No nacho feast is complete without these two stars. They offer a creamy contrast that makes each bite even more enjoyable.
Put these key ingredients together, and you’ve got a crowd-pleasing creation straight out of your wildest nacho dreams!
Why You’ll Love This Recipe
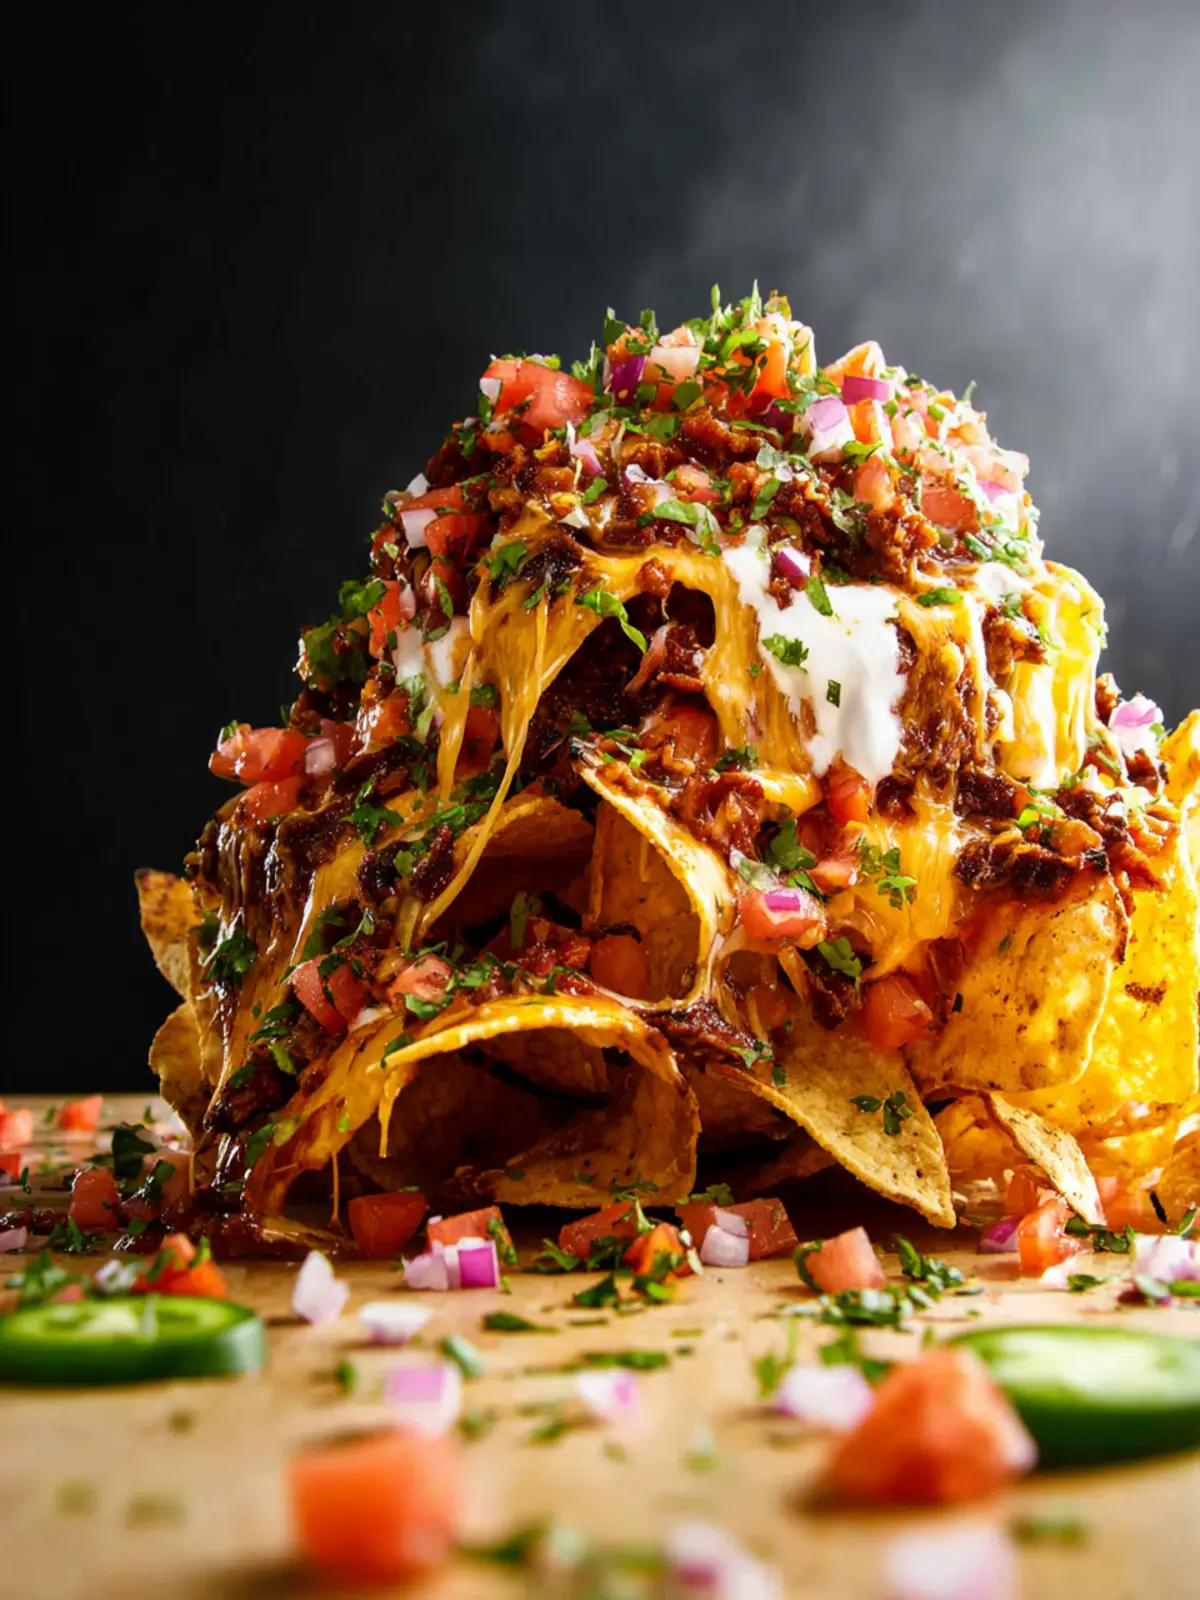
Trash can nachos aren’t just a meal; they’re an experience that you’ll want to share with friends and family. Imagine gathering around a gigantic pile of crispy tortilla chips, melted cheese, and all your favorite toppings, served straight from a whimsical “trash can.” It sounds messy, but that’s where the fun begins.
The beauty of this recipe lies in its versatility. You have the freedom to customize it based on your cravings. Whether you prefer classic flavors like seasoned ground beef and jalapeños or you want to mix it up with spicy pulled pork and guacamole, the options are endless. And let’s be honest—who doesn’t love a meal that’s as much fun to make as it is to eat?
Gathering and Sharing:
One of the best parts about making trash can nachos is that it’s perfect for parties or game days. You can easily impress your guests with a vibrant display of toppings while keeping the preparation simple. Plus, the interactive element allows everyone to dig in and personalize their portion, creating a communal atmosphere that sparks joy and laughter.
Get ready to delight your taste buds with a recipe that combines flavors, textures, and a dash of creativity. Trash can nachos are truly a crowd-pleaser that will make any gathering unforgettable.
Variations of Trash Can Nachos
Trash can nachos are not just a one-size-fits-all dish; they’re a canvas for your culinary creativity. Imagine a towering pile of nachos that reflects your favorite flavors or ingredients. Here are some delicious variations to consider for your next gathering.
Classic Tex-Mex Fiesta
- Proteins: Layer ground beef or shredded chicken with your tortilla chips for a hearty base. Spice it up with taco seasoning or smoky chipotle for a kick.
- Cheese: A blend of sharp cheddar and Monterey Jack melts beautifully, giving that classic nacho cheese experience.
- Toppings: Don’t forget fresh diced tomatoes, jalapeños, and a drizzle of sour cream to balance the spice!
Veggie Lover’s Delight
For those seeking a fresher take, swap out the meats:
- Chips: Use blue corn tortilla chips for an eye-catching color contrast.
- Grilled Vegetables: Consider adding zucchini, bell peppers, and mushrooms. Grill them to bring out their natural sweetness.
- Ingredients: Top with guacamole, pico de gallo, and black beans for a filling yet plant-based option.
BBQ Bliss
How about a BBQ twist?
- Base: Instead of regular chips, use BBQ-flavored tortilla chips to set the stage.
- Rib Meat: Shredded BBQ pork or chicken adds a smoky depth.
- Toppings: Drizzle with ranch dressing and scatter coleslaw on top for a crunchy finish—trust me, it’s a game-changer!
Each variation of trash can nachos offers an opportunity to customize and impress your guests. So gather your friends, pick a favorite variation, and indulge in a creative nacho experience that’ll leave everyone raving!
Cooking Tips and Notes for Trash Can Nachos
Creating trash can nachos is not just about piling ingredients high; it’s about mastering the art of layering flavors and textures. Here are some tips to elevate your nacho game:
Choose Your Chips Wisely
Opt for sturdy tortilla chips; they’ll hold up against the toppings and won’t collapse under pressure. Look for thick-cut options or those labeled “restaurant-style.” If you can find them, blue corn chips add a unique twist!
Layering Is Key
Start with a solid base of chips, then layer on your ingredients. Begin with cheese to create a melty barrier, followed by proteins, beans, and veggies. This prevents soggy chips and ensures every bite is packed with flavor.
Mix Your Flavors
While traditional toppings like jalapeños and sour cream are fantastic, feel free to get creative! Consider adding caramelized onions or spicy salsas for extra depth. Flavor is key—mixing textures and heat levels will keep everyone guessing.
Serve Immediately
Trash can nachos are best served right away, as they can lose their crunch quickly. If you have to prepare them in advance, consider setting up a nacho bar. This way, everyone can customize their plate, ensuring freshness and fun.
Personal Touches
Don’t be afraid to add unique toppings inspired by your cooking style. A drizzle of chipotle crema or a sprinkle of fresh cilantro can transform your nachos from good to unforgettable. Consider what your guests love, and adjust accordingly!
With these tips in hand, you’re set to create an unforgettable dish that’s sure to impress at your next gathering. Enjoy the delicious journey of making your own trash can nachos!
Serving Suggestions for Trash Can Nachos
When it comes to trash can nachos, they’re not just a snack; they’re a full-on experience that brings friends and families together. Picture this: a bustling game day gathering or a cozy movie night with loved ones, all drawn to a towering pile of cheesy, crunchy goodness. Here are some fun ways to elevate your trash can nachos experience!
Perfect Pairings
-
Beverage Selection: Pair your nachos with a refreshing craft beer, a fruity cocktail, or even a homemade lemonade. The tangy flavors can lighten the rich toppings.
-
Dipping Sauces: Enhance each bite with a variety of dipping sauces like guacamole, salsa, or a zesty ranch dressing. They add an extra layer of flavor and keep things exciting.
Serving Style
-
Self-Serve Style: Set up a nacho bar where guests can customize their own portions. This turns your delicious trash can nachos into an interactive meal that suits everyone’s taste.
-
Family Style Platter: If you prefer a more traditional dining approach, serve your nachos on a large platter and let everyone dig in. This encourages sharing and makes for delightful conversation.
No matter how you choose to serve your trash can nachos, they’re sure to be a hit!
Time Breakdown for Trash Can Nachos
Creating a tower of trash can nachos is about more than just the delicious layers of cheese, toppings, and crispy chips—it’s also about the time you invest to make this crowd-pleaser. Picture the excitement as you prepare this fun dish for your next gathering!
Preparation Time
The prep work for your trash can nachos takes about 20 minutes. This includes gathering all your favorite toppings, layering the chips, and getting your other ingredients ready.
Cooking Time
Once your masterpiece is assembled, pop it in the oven! Cooking will take another 20 minutes, allowing the cheese to melt beautifully and the flavors to meld together.
Total Time
In just 40 minutes, you’ll have a show-stopping nacho dish that your friends will rave about. This speedy process ensures that you spend more time enjoying your company than slaving away in the kitchen!
Nutritional Facts for Trash Can Nachos
When you indulge in trash can nachos, it’s not just about the flavors; it’s also important to know what you’re consuming. While these delightful treats are a crowd-pleaser at gatherings or a fun solo snack, understanding their nutritional profile can help you enjoy them responsibly.
Calories
Per serving, trash can nachos come in at approximately 350-450 calories. This range can vary based on the toppings and portion sizes you choose. The combination of cheesy goodness and savory flavors packs a satisfying punch that can fuel your next adventure.
Protein
You can expect around 15-20 grams of protein in a serving of trash can nachos. This comes from the cheese, meat, and any added beans, making it a hearty option to keep you going, whether you’re watching the game or catching up with friends.
Sodium
One of the considerations with trash can nachos is sodium content, typically falling between 800-1,200 mg per serving. It’s wise to watch your sodium intake, especially if you’re adding salty toppings like cured meats or canned sauces. Balancing them with fresh ingredients can help keep the flavor high and the sodium in check!
FAQ about Trash Can Nachos
Creating the perfect Trash Can Nachos is not just about layering toppings; it’s about making a delightful experience for your taste buds. However, as with any fun and unique recipe, you might have some questions. Let’s explore them!
Can I make Trash Can Nachos vegetarian?
Absolutely! Transforming your Trash Can Nachos into a vegetarian delight is simple. Swap out traditional meat toppings like beef or chicken for hearty alternatives such as black beans, grilled vegetables, or roasted chickpeas. You can also pile on extra cheese, guacamole, and all your favorite toppings without any meat, making it substantial and flavorful.
How do I store leftovers?
If you find yourself with leftover Trash Can Nachos, don’t fret! Simply transfer them to an airtight container and refrigerate. They can last about 2-3 days. To enjoy them again, reheat in the oven until the cheese is bubbly and everything’s warmed through. Just a heads up: the texture of the nachos might change a bit, but they’ll still taste delicious!
Can I prepare the nachos in advance?
Yes, you can get a head start on your Trash Can Nachos! Prepping components like cheese, toppings, and proteins ahead of time can save you stress. Layer everything except the chips and bake right before serving for a fresh crunch. You can assemble your nacho tower dry and wait to bake until you’re ready to impress your guests. This way, you maintain that glorious crispy texture!
Whether you’re hosting a game night or just indulging in a personal treat, these handy tips will make your Trash Can Nachos experience even more enjoyable.
Conclusion on Trash Can Nachos
Trash can nachos offer a fun and relaxed way to enjoy a classic favorite while hosting friends or enjoying a movie night at home. This playful dish allows for endless customization, letting you tailor the toppings to suit everyone’s tastes. Imagine the oohs and aahs as you pull out the towering portion for all to share. Whether you’re piling on spicy jalapeños, velvety cheese, or zesty salsa, each bite is an explosion of flavor. Embrace the messiness and laughter that comes with digging into this delicious creation, and remember, there are no rules—just good vibes and great food. Enjoy your trash can nachos!
Print
Loaded Nacho Tower
- Total Time: 30 minutes
- Yield: 4 servings 1x
- Diet: None
Description
A fun and delicious way to enjoy nachos with layers of flavor!
Ingredients
Scale
- ½ onion (finely chopped)
- 1 lb. ground beef
- 15 oz. black beans (1 can)
- to taste salt
- to taste garlic powder
- to taste chili powder
- to taste cumin
- 10 oz. diced tomatoes with green chilies (1 can)
- 16 oz. Velveeta queso blanco cheese (sliced into cubes)
- 12–13 oz. tortilla chips (1 bag)
- 2 cups shredded cheddar cheese (divided)
- for topping sour cream
- for topping BBQ sauce
- 3 jalapeño peppers (2 chopped, 1 sliced)
- 3 roma tomatoes (diced)
- 2 tbsp finely chopped onion
- 2 tbsp chopped cilantro
- juice of 1 lime
- for topping pickled onions
Instructions
- Add the beef, onion, and taco seasoning to a skillet over medium heat. Brown the ground beef. Take off the heat and set aside.
- Pour the black beans from the can, undrained, into a saucepan over medium heat. Sprinkle with salt, garlic powder, chili powder, and cumin. Stir occasionally until heated. Then, mash with a potato masher, leaving some beans whole. Take off the heat and set aside.
- Add the diced tomatoes and Velveeta to another saucepan over medium heat. Stir until the cheese is completely melted and smooth.
- Preheat the oven to 400°F. Line a large sheet pan with parchment paper.
- Spoon a circular layer of cheese sauce (about the size of the can) in the middle of the sheet pan. Place the can directly over the circle of cheese sauce.
- Layer the following in the can: tortilla chips, cheese sauce, meat, beans, shredded cheese, sour cream, BBQ sauce. Repeat these layers 3 more times.
- Place the nachos in the oven for 10 minutes.
- To make the pico de Gallo, combine the chopped jalapeño peppers, roma tomatoes, cilantro, and lime juice in a bowl.
- Remove the nachos from the oven. Wearing oven mitts, gently lift the can up to reveal the tower of nachos. Drizzle with sour cream and BBQ sauce. Then, add the jalapeño slices, and a few spoonfuls of pico de Gallo and pickled onions on top.
Notes
- Adjust spices according to your taste preferences.
- For extra flavor, you can add additional toppings like guacamole or olives.
- Prep Time: 20 minutes
- Cook Time: 10 minutes
- Category: Appetizer
- Method: Baking
- Cuisine: Mexican
Nutrition
- Serving Size: 1 plate
- Calories: 800
- Sugar: 3g
- Sodium: 1200mg
- Fat: 45g
- Saturated Fat: 20g
- Unsaturated Fat: 15g
- Trans Fat: 0g
- Carbohydrates: 60g
- Fiber: 8g
- Protein: 40g
- Cholesterol: 120mg